Sand Blocks Level 471 Walkthrough & Answers
ExpertLevel 471 video solution · 3:31 · 1.5K views · published September 2026
Watch on YouTube →- Difficulty
- Expert
- In its tier
- 222 of 451
- Through the game
- 67%
- Walkthrough
- 3:31
- Views
- 1.5K
Sand Blocks Level 471 usually blocks players on the first few pulls, not at the end. It is an Expert board — the 222nd of 451 in that tier, about 67% of the way through the game. One careful watch plus the numbered steps is usually enough to clear it on your own board.
Level board
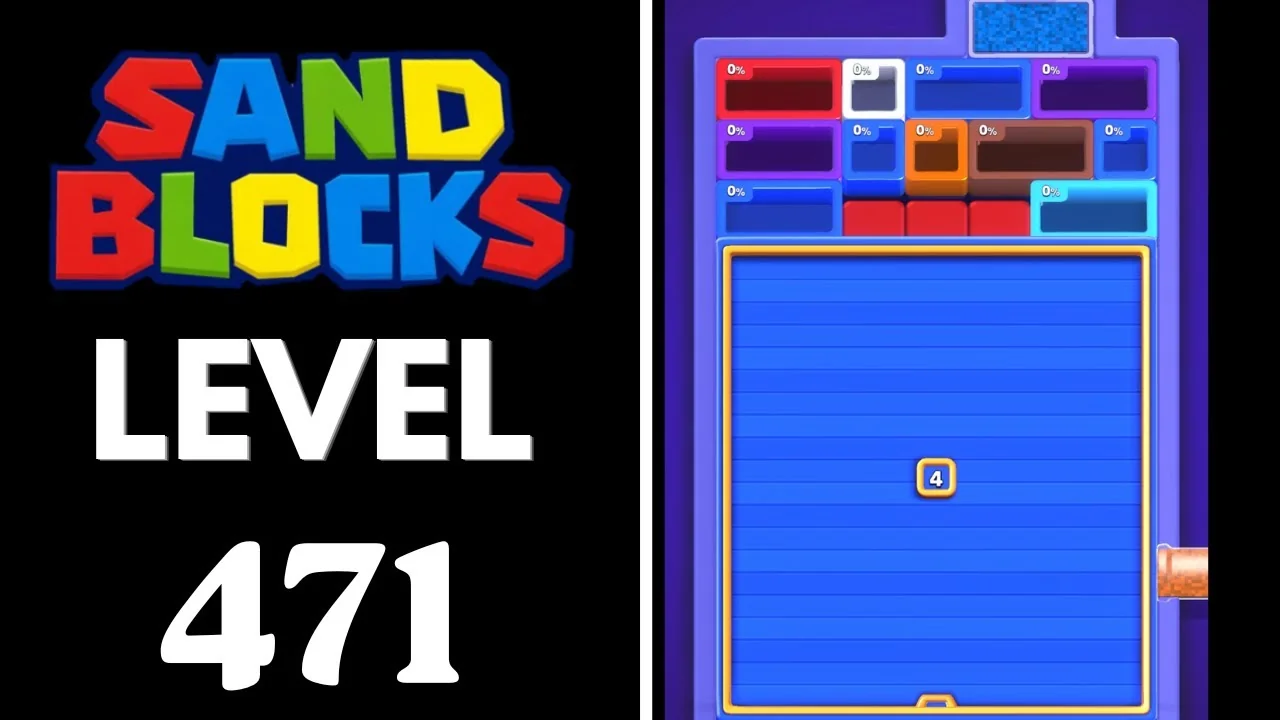
How to clear Sand Blocks Level 471
A frame-by-frame guide to Sand Blocks level 471: one top tube for the first minute, a right mouth that wakes up at 1:04, two badge-3 panes that burst at 0:24 and 1:54, and a red tail with eight seconds left.
Step-by-step walkthrough
Prefer screenshots to video? Every key moment of the clear is below in order, with a before/after frame and the lock counts either side of the move. Keep it open next to the game and follow along.
Level 471 is a patience level dressed up as a big level. It runs on a 3:25 clock, but for the first minute there is only one stream: the top tube, which opens on cyan and turns magenta at 0:23. The right-hand mouth stays completely idle until about 1:04, so everything before that point is a single-lane exercise with almost nothing collecting.
The board itself opens under two covers. A big blue glass pane with a gold badge of 3 seals the lower two-thirds and bursts at 0:24; a second badge-3 pane sits over the middle of the board and bursts at about 1:54. Every completion knocks one off every remaining badge, which is why the two bursts land so early relative to the clock: the pane is the level's real timer.
The pairs below are before/after frames from the clear in the video above. Left frame is before the change, right frame is after. Two moments decide the run: the burst at 1:54, and the second the right mouth comes alive.
Level 471 at a glance
| Detail | Level 471 |
|---|---|
| Difficulty | Expert |
| Timer | 3:25 |
| Colours on the board | Cyan, magenta, red, orange, brown, yellow, white, purple, blue |
| Sand feeds | Top tube plus a right mouth that starts at 1:04 |
| Top tube order | Cyan, magenta, white, yellow |
| Right mouth order | Orange, cyan, red |
| Panes | Blue pane 3 (bursts 0:24), middle pane 3 (bursts 1:54) |
| Clear time | About 3:23 |
| Time left at the clear | About 8 seconds |
| Source run | The video solution above |
The one structural fact worth remembering: the top tube runs dry at 3:02. Everything left after that has to be reachable from the right mouth, which is why the last pits of this run are all on the right-hand side of the board.
The ten-step route
| # | Time | What happens | Where it happens |
|---|---|---|---|
| 1 | 0:04-0:24 | The blue pane runs 3 to 2 to 1 and bursts; the top tube turns magenta | Lower two-thirds |
| 2 | 0:24-0:40 | A new badge-3 pane appears over the middle | Top and centre |
| 3 | 0:40-1:04 | A brown bar clears and a white vertical pit appears | Centre-right |
| 4 | 1:04-1:28 | The right mouth wakes up with orange sand | Right edge |
| 5 | 1:28-1:48 | Right mouth turns cyan; the yellow L fills and clears | Right and centre |
| 6 | 1:48-2:04 | The middle pane goes dark and bursts by 1:54 | Centre |
| 7 | 2:04-2:20 | A cyan glass block fills at 2:06 and empties at 2:08 | Right-middle |
| 8 | 2:20-2:48 | White phase: blue-grey pits and the magenta leftovers clear | Whole board |
| 9 | 2:48-3:16 | Yellow phase: the big yellow structure clears, the tube runs dry at 3:02 | Top and left |
| 10 | 3:16-3:23 | Red tail from the right mouth; board empty with eight seconds left | Right and centre |
Step 1 - The blue pane bursts (0:04-0:24)
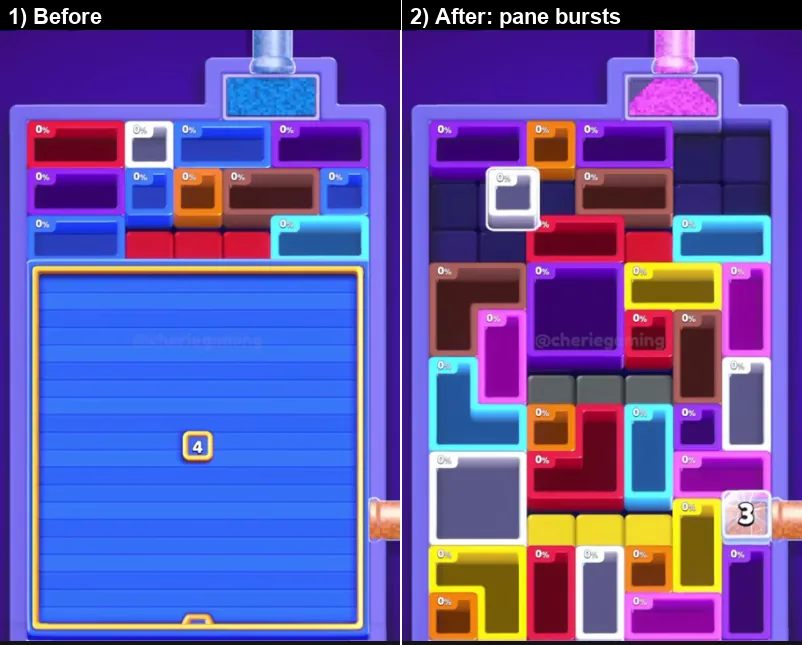
The level opens with cyan sand from the top tube and a band of coloured pits above a big blue glass pane carrying badge 3. The badge runs down through 2 at 0:10 and 1 at 0:14, and the pane bursts at 0:24, the same second the top tube turns magenta.
- What to do: chase completions in the small band above the pane, not fills in the covered area.
- Why it works: the covered board cannot accept sand, so every pit you can actually finish is in the open strip.
- Do not: try to work the lower board before the burst. It is behind glass.
Step 2 - The new middle pane (0:24-0:40)
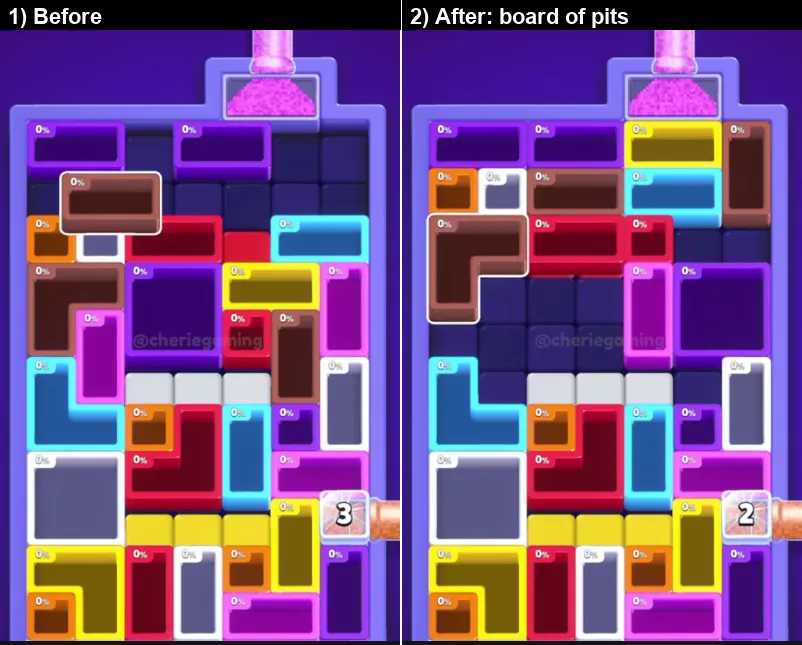
The lower board opens into a packed layout of pits at 0 percent, and a new badge-3 pane takes its place across the middle. Magenta sand pours from the top, the badge ticks to 2 at 0:30, and the top-right corner turns into empty grid.
- What to do: read the new mosaic completely before the next drag; it is a different board.
- Why it works: the burst is a free re-pack, so nothing you learned about positions a second earlier still applies.
- Do not: assume the badge-3 pane is decoration. It blocks the middle and it is the next gate.
Step 3 - Brown bar out, white pit in (0:40-1:04)
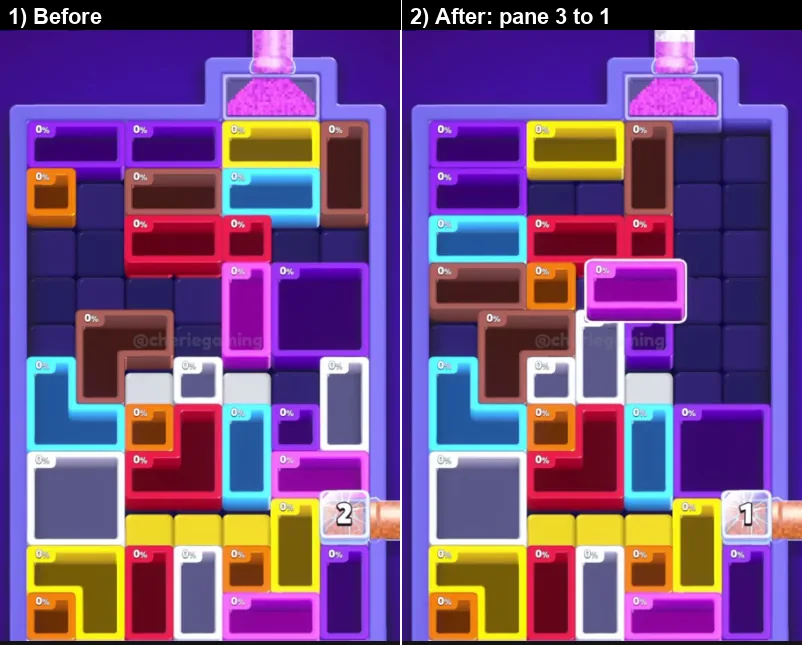
The brown bar in the centre clears and a white vertical pit appears on the right edge. Cyan, red and magenta pits grow under the magenta stream, and the middle pane badge drops from 2 to 1 at 0:58.
- What to do: keep the stream on the pits closest to the top mouth; the right mouth is still dead.
- Why it works: single-stream seconds are the most expensive seconds on this level, so only pits in the top lane can be paid for.
- Do not: park anything under the right mouth yet. A dead mouth fills nothing.
Step 4 - The right mouth wakes up (1:04-1:28)
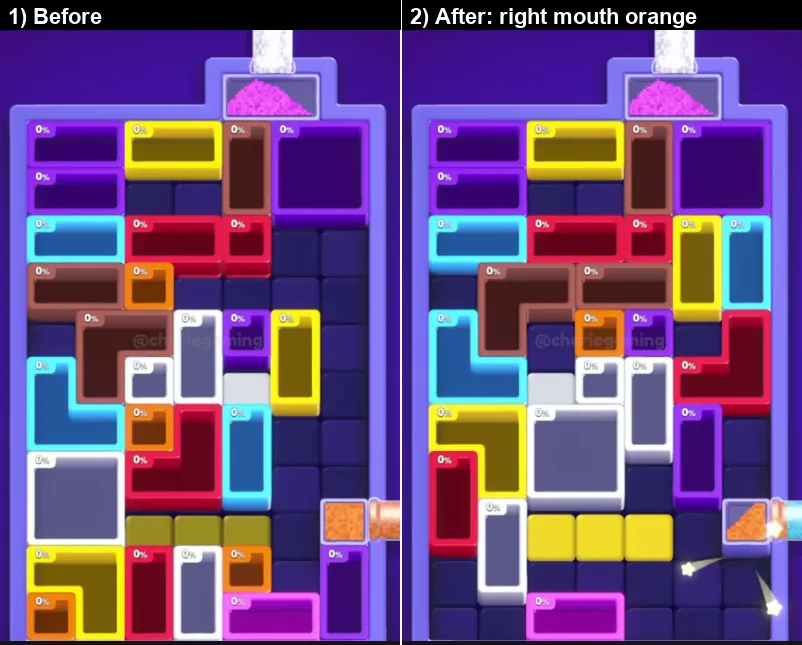
For the first time in the run the right mouth produces sand, and it is orange. An orange pit runs to 62 percent and the orange and dark-red pits on the right clear at about 1:24 to 1:27.
- What to do: move your best matching pits to the right edge immediately and spend the whole orange window there.
- Why it works: a mouth's first colour is a short window. Orange lasts about twenty-three seconds and then never comes back.
- Do not: split attention between the two streams. The top stream will still be there; orange will not.
Step 5 - Orange to cyan, yellow L clears (1:28-1:48)
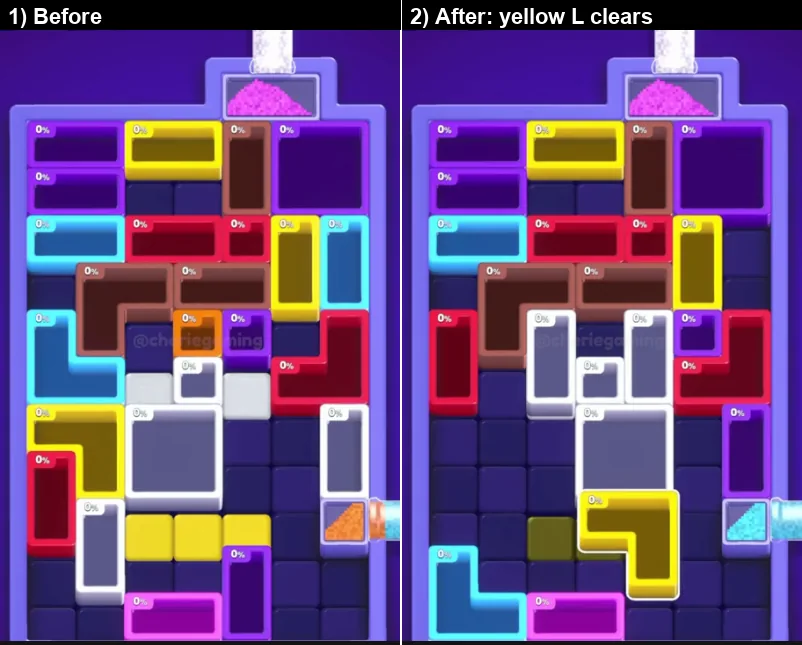
At about 1:28 the right mouth changes from orange to light blue, and the yellow L in the centre-right fills and clears. Two full re-packs land at 1:36 to 1:38 and 1:46 to 1:48, leaving the board half empty with white-outlined 0 percent pits.
- What to do: re-read the board after each re-pack instead of continuing the previous plan.
- Why it works: the double re-pack inside twenty seconds is what halves the board, and it only pays if the new pits are already in position.
- Do not: keep dragging a pit that no longer exists on the board.
Step 6 - The middle pane bursts (1:48-2:04)
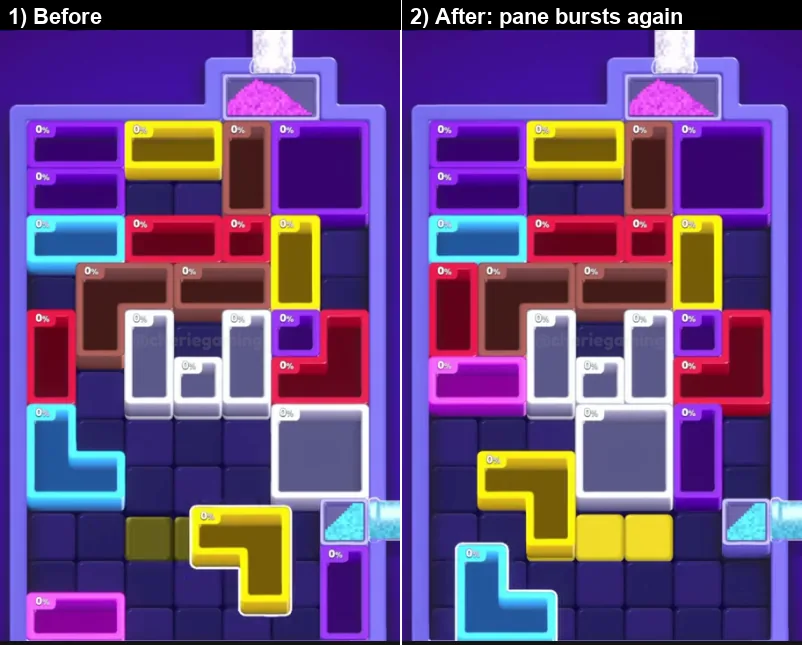
The middle pane goes dark at 1:52 and bursts by about 1:54. Magenta and purple L blocks appear at the bottom and a large re-pack lands at 2:04.
- What to do: treat 1:54 as the midpoint of the level and re-plan from scratch.
- Why it works: both panes are now gone, so from here the whole board is live and the only limit is fill rate.
- Do not: keep working the top lane exclusively. With two live mouths the right edge is now free throughput.
Step 7 - The cyan glass block (2:04-2:20)
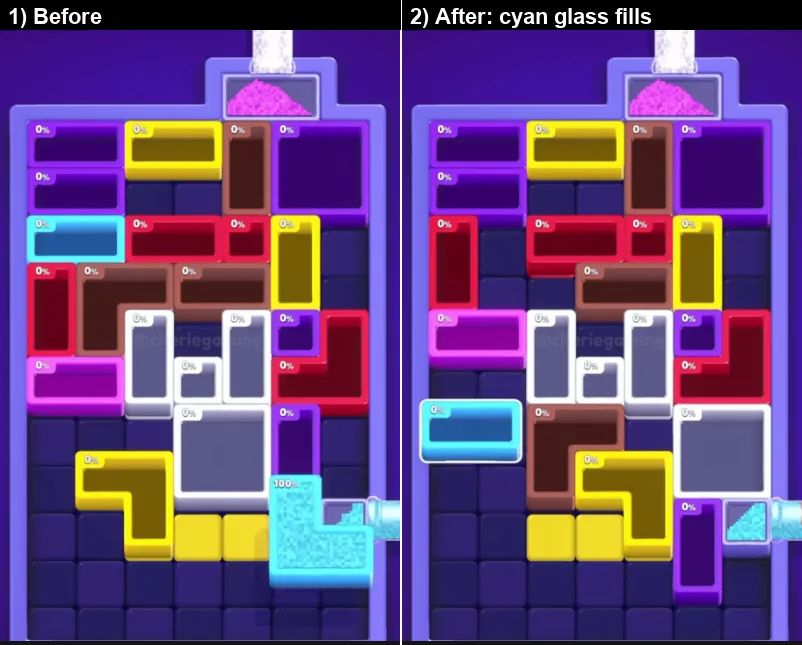
A block of cyan glass on the right fills with sand at 2:06 and is empty again at 2:08, the fastest single object of the whole run. The board around it is sparse: a few white-outlined 0 percent pits and large empty areas.
- What to do: use the densest remaining shapes as your targets and ignore empty space.
- Why it works: glass objects like this one complete in about two seconds, which makes them the cheapest progress on a thin board.
- Do not: hunt for a symmetric layout. There is nothing left to arrange.
Step 8 - The white phase (2:20-2:48)
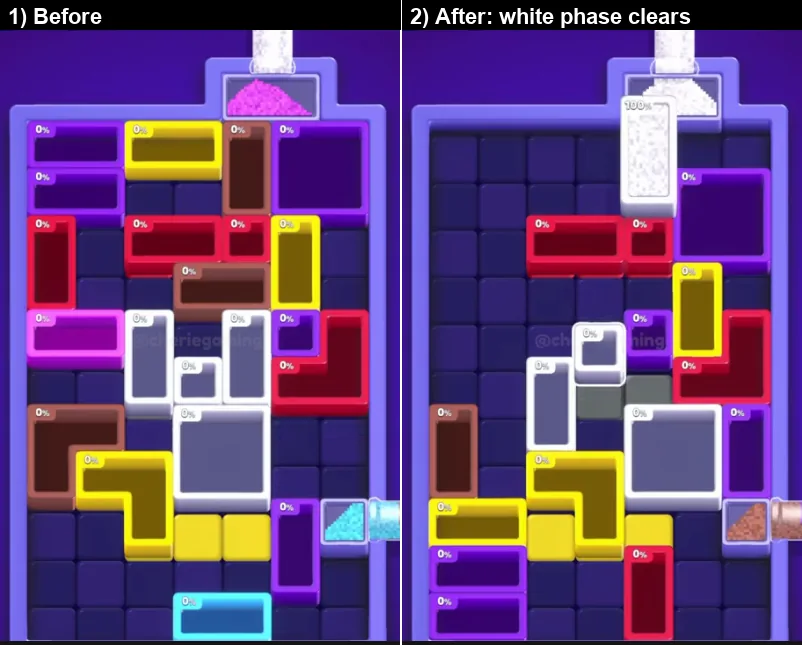
White sand runs down the tube. The blue-grey pits clear between 2:22 and 2:28, and the last magenta pits finish at 2:40 to 2:48. The top tube turns yellow at 2:48.
- What to do: judge the white phase by what disappears from the board, not by what glows on it.
- Why it works: white sand has almost no hue, so the only reliable signal is the pit vanishing.
- Do not: wait for a visible colour change before moving a pit. By the time the stream looks white, the window is already running.
Step 9 - The yellow phase (2:48-3:16)
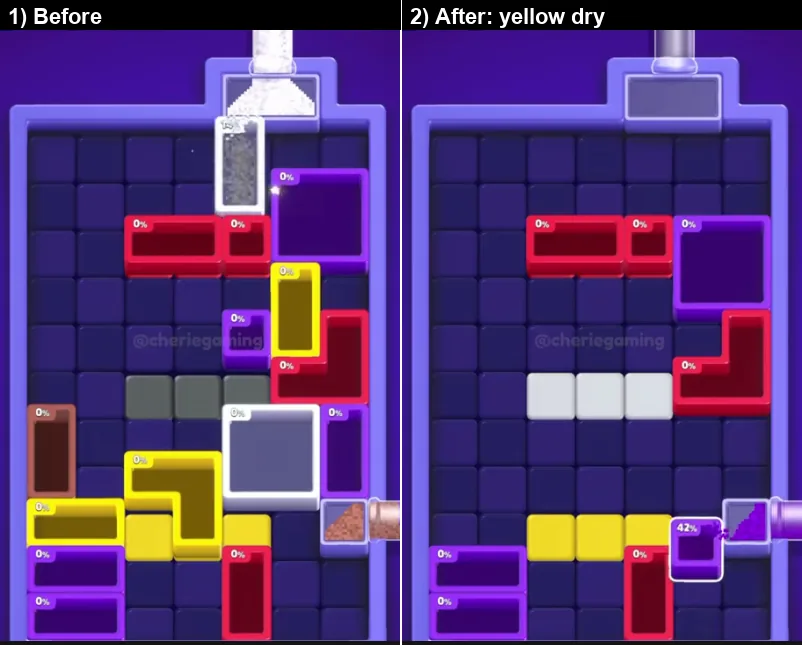
The big yellow structure clears by about 2:56, and at 3:02 the top tube stops running. The board is reduced to red bars, one white three-cell, a yellow bottom row and purple and red blocks.
- What to do: finish the yellow structure while the top stream is still alive and leave the rest to the right mouth.
- Why it works: after 3:02 the top feed is gone permanently, so anything the right mouth cannot reach becomes unfinishable.
- Do not: leave a top-only pit alive past 3:02.
Step 10 - The red tail (3:16-3:23)
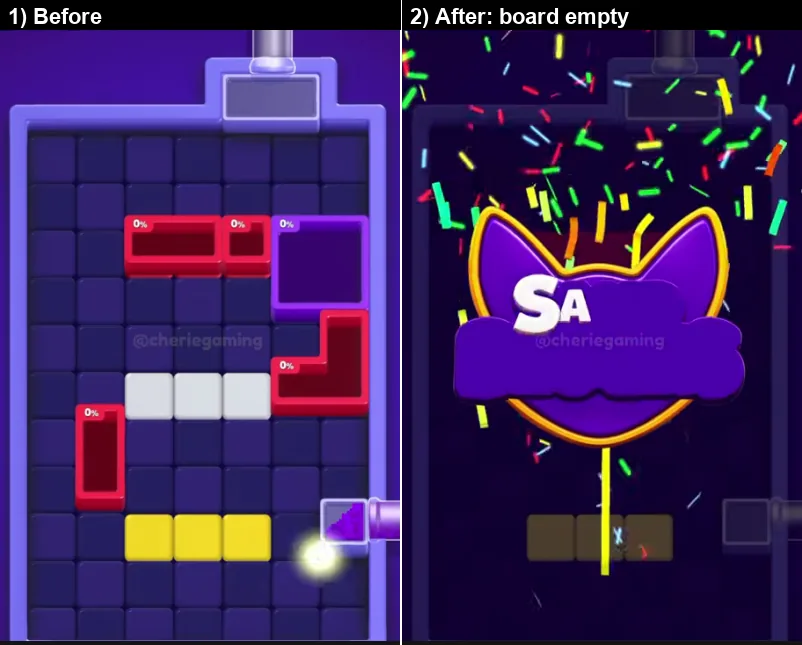
Purple reaches 100 percent at 3:16, a red L clears at 3:18, and the last red bar and red block are out by 3:23. The board is empty with eight seconds on the clock and the rewards card lists Rewards 40 and x2 Coins 80.
- What to do: feed the right mouth's red stream into whatever is nearest it.
- Why it works: the endgame is already decided by the positioning you did between 2:48 and 3:02, so the last thirty seconds are pure execution.
- Do not: drag a far-side pit across the board at 3:20. There is no time for the second drag.
What each colour is doing
| Colour | Role on Level 471 |
|---|---|
| Cyan | The workhorse. Top tube from 0:04 to 0:23 and again from the right mouth at 1:28, driving the re-packs at 1:36 and 1:46. |
| Magenta | The longest single-colour phase, 0:23 to 1:14. Its clears are what thin the first packed board. |
| Orange | The right mouth's first colour at 1:04. A short window: use it immediately or lose it. |
| White | 1:16 to 2:48. It clears the blue-grey and magenta leftovers. Judge it by what disappears. |
| Yellow | 2:48 to 3:02. It clears the big yellow structure and then the tube goes dry. |
| Red | The tail, 3:16 to 3:21, from the right mouth. |
| Blue and middle panes | Badge-3 covers that burst at 0:24 and 1:54. They are the two gates of the level. |
Three rules that carry the level
- Bursts, not drips. Almost every pit sits at 0 percent until a completion re-packs the board, so set up one fast clear and let the re-pack do the work.
- A dead mouth is a lost stream. The right mouth does nothing for the first minute. Knowing when your second stream starts is the whole strategic content of the opening.
- Dry tail. The top tube stops at 3:02, so whatever remains must be reachable from the right mouth alone. Keep the last pits on the right-hand side.
Common mistakes on level 471
- Working the covered board. Before 0:24 and before 1:54 part of the board is behind glass.
- Missing the orange window. It runs from 1:04 to 1:27 and never returns.
- Ignoring the 3:02 dry point. Leaving a top-lane pit alive after the tube stops is the classic way to lose this level.
- Treating the white phase as empty time. White clears the blue-grey pits, which are invisible to a quick look.
- Re-dragging after a re-pack instead of reading. Two full re-packs inside twenty seconds rewrite the layout twice.
Quick reference
Blue pane 3, 2, 1 and bursts at 0:24 -> new middle pane, magenta pours -> brown bar clears, white pit appears -> right mouth wakes with orange at 1:04 -> orange to cyan, yellow L clears -> middle pane bursts at 1:54 -> cyan glass block at 2:06 -> white phase clears blue-grey and magenta -> yellow structure clears, tube dry at 3:02 -> red tail, board empty at 3:23 with eight seconds left.
The complete run is embedded at the top of the page, and the timestamps above refer to it.
Where Level 471 sits in Sand Blocks
Level 471 is the 222nd of 451 Expert boards in Sand Blocks: Drop Puzzle, and about 67% of the way through the 700 levels this guide currently covers.
Expert boards run from Level 250 to Level 700, and this page covers the 222nd of them, in the earlier half of the tier.
It sits between Level 470 and Level 472, inside the 441-480 block of the level index.
The walkthrough above runs 3:31 and shows the clear start to finish.
More expert walkthroughs
View all →
Sand Blocks Level 471 FAQ
How do I beat Sand Blocks Level 471?
Follow the step-by-step walkthrough below. It splits the clear into ten key moments, shows the lock counts before and after each move, and gives the full green-to-red order for the 3:00 timer.
What difficulty is Level 471 in Sand Blocks?
Level 471 is rated Expert difficulty in Sand Blocks: Drop Puzzle — the 222nd of 451 boards in that tier, and level 471 of 700 overall.
Is there a video walkthrough for Sand Blocks Level 471?
Yes — this page includes the full 3:31 video walkthrough, plus the written pull-order steps beneath it. You can also watch it directly on YouTube.
Featured walkthroughs
The levels players search for most - each with a full video guide.